There’s something incredibly satisfying about capturing the motion of light in a single frame. Whether it’s the rush of car headlights down a highway or the glowing patterns of city traffic at night, light trail photography can turn everyday scenes into something magical.
I’ve spent a lot of time experimenting with different setups, camera settings, and locations to get the best results. In this guide, I’ll share everything I’ve learned along the way, from choosing the right gear to framing and timing your shots just right.
Whether you’re brand new to long exposures or looking to sharpen your skills, this guide has you covered.
Let’s get started!
What is Light Trail Photography
Light trail photography is a creative and beautiful technique that captures the beauty of movement in an image.
It is achieved by taking a long-exposure photograph, which allows you to capture streaks of light created by moving objects such as cars or stars streaking across the night sky. This type of photography often requires some equipment (as we will see later in this article), like a tripod and lens filters for reducing glare, but can be done very easily with even just an ordinary digital camera.
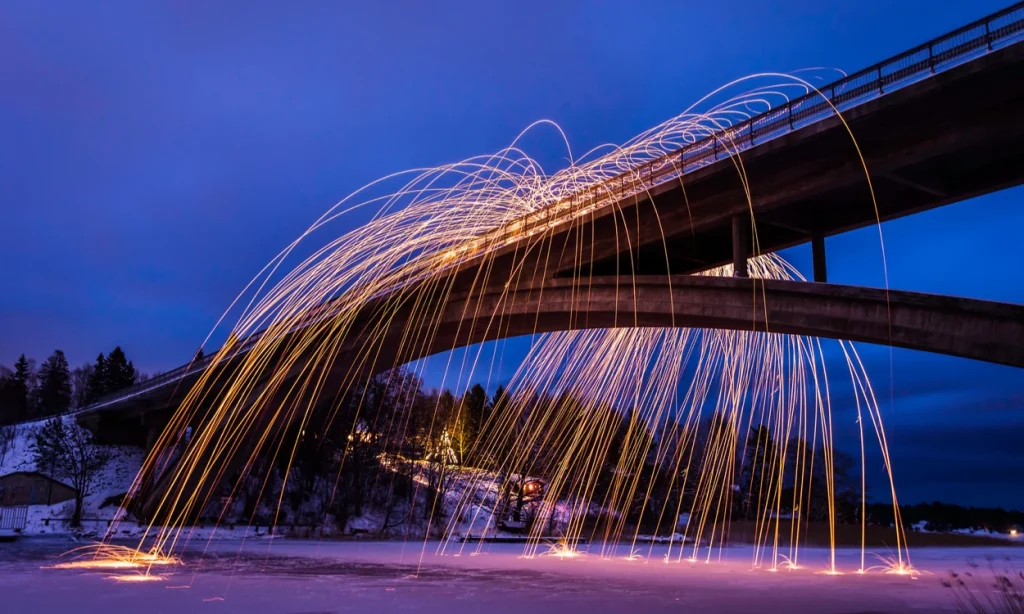
The results are truly stunning – colorful trails of light illuminating beautiful scenes that only exist in motion.
To get the best effects, you will often have to experiment with different shutter speeds and angles to achieve the desired effect.
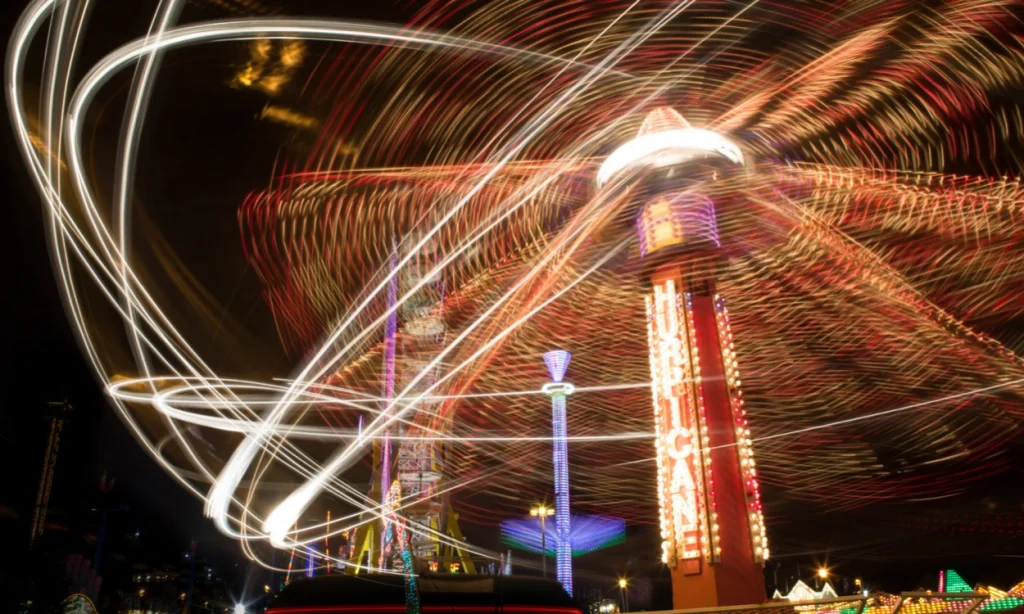
Light trail photography also works well when combined with other techniques such as panning or time-lapse photography. With this artistic approach to capturing motion, you can create masterpieces out of everyday scenes that would otherwise be overlooked.
Light trail photography is interesting because it allows you to capture light in a very unique way. It can be used to create beautiful and abstract images, and is a great way to experiment with light and composition.
Later in this article, we will see several examples of light trail photography for you to have some inspiration!
What are the best camera settings?
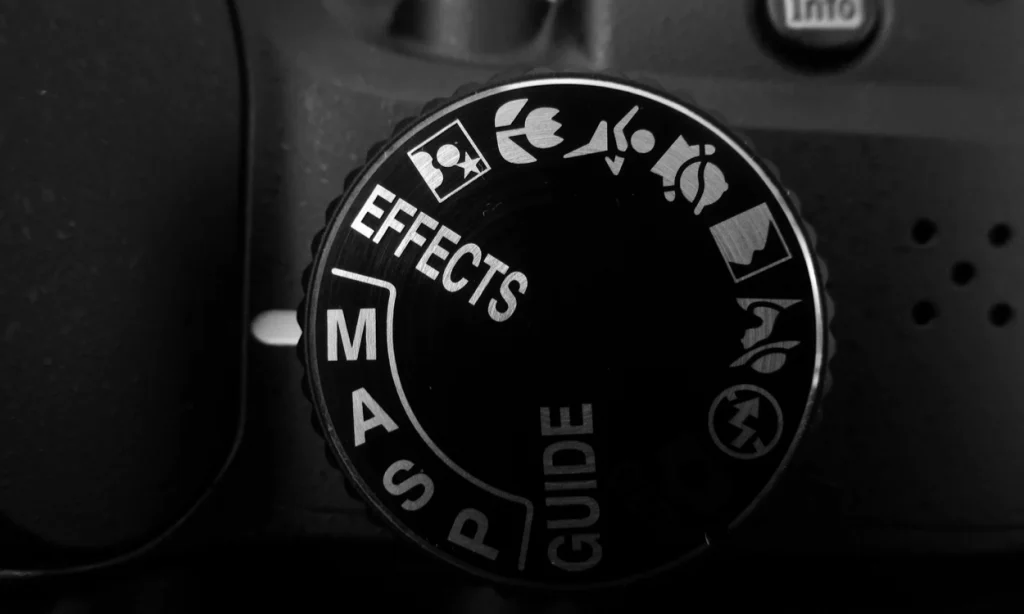
When shooting light trail photos, it is important to shoot in manual mode. This will allow you to have more control over the settings of your camera, such as shutter speed and ISO, and will help you to achieve the best results possible.
Using manual settings on your camera is the best way to achieve great results when taking photos. Manual settings allow you to control the shutter speed, aperture, and ISO which can all affect the outcome of a photograph and furthermore make you adjust for every scenario possible.
With these three elements in place, each photographer can create an image that best suits their particular style and creative vision.
Another benefit of using manual settings is that it gives you more control over the exposure of your images. This means you can adjust each setting to ensure you have the perfect lighting for whatever subject you are shooting.
By mastering manual control over these elements, you can get exactly the look they want in any situation.
If you are not familiar with how to use manual mode, don’t worry we are going through everything here, step by step.
Manual Focus
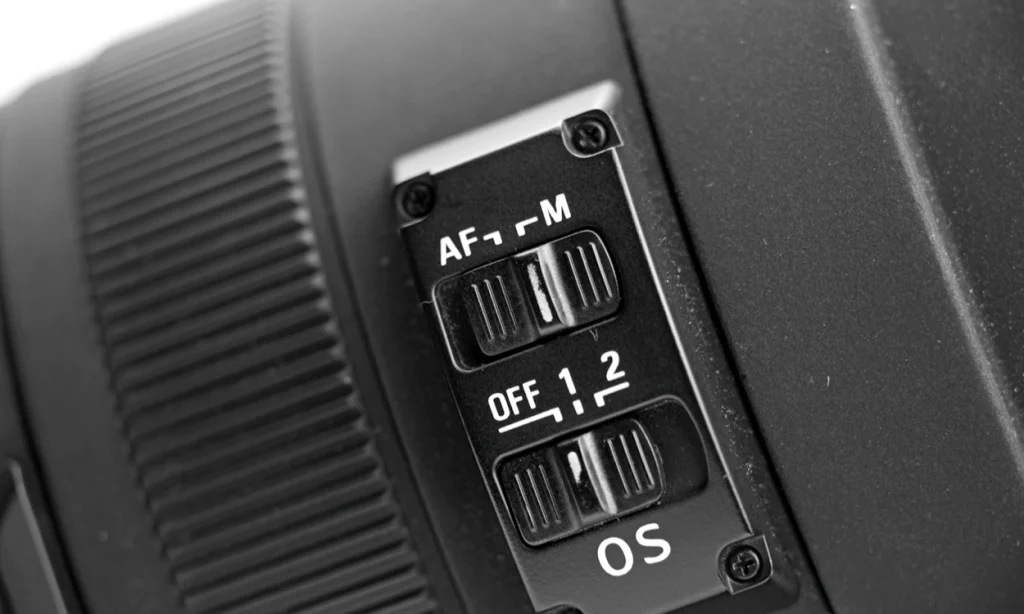
It is important to set manual focus on your lens when doing light trail photography because you want to make sure that your camera is focused on the light source. If your camera is not focused properly, the light trails will be blurry and not as defined.
To set your lens to manual focus, look for a small switch on the lens and set it where it says “Manual Focus”. Doing so will allow you to set your focus manually.
Shutter Speed
The shutter speed is one of the most important settings when doing light trail photography. You want to make sure that you have it set to a slow shutter speed in order to capture the light trails properly.
A good starting point is to set your shutter exposure time at around 30 seconds. However, you may need to adjust this depending on the light conditions and how bright the light trails are.
If you’re shooting in low light conditions, you will likely need a slower shutter speed to capture the light trails. Conversely, if you’re shooting in brighter conditions, you may need a faster shutter speed to avoid overexposing your image.
It is important to experiment with different shutter speeds to see what works best for the light conditions and subject matter.
Since with long exposure photography, the exposure time is most likely going to be long, in order to eliminate the camera shake effect, it would be ideal to use a tripod when taking this kind of pictures.
ISO
In light trail photography, it is important to use a low ISO setting. This will help to avoid noise and grain in your image.
A good starting point is to set your ISO at around 100. However, you may need to adjust this depending on the light conditions and how bright the light trails are.
If you’re shooting in low light conditions, you will likely need a higher ISO to capture the light trails. On the other hand, if you’re shooting in brighter conditions, you may need a lower ISO to avoid overexposing your image.
Aperture
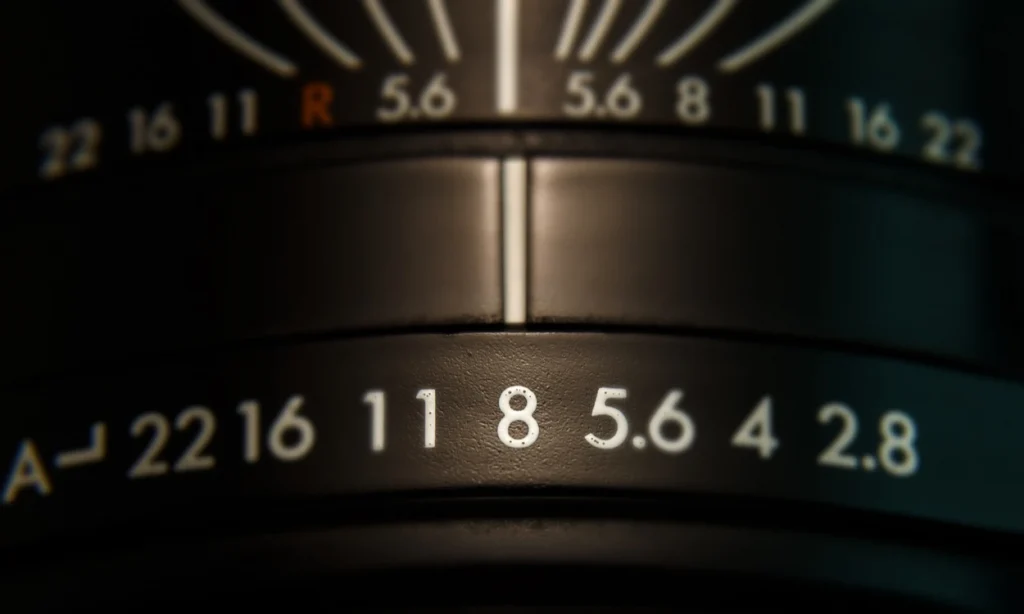
The aperture is the opening in your lens that allows light to enter and hit the sensor. It is important to set your aperture to a small number such as f/16 or f/22. This will help to ensure that your light trails are sharp and defined.
It is also important to note that the aperture will affect your depth of field. A small aperture (f/16) will give you a larger depth of field, which means that more of your image will be in focus. A large aperture (f/2.8) will give you a smaller depth of field, which means that less of your image will be in focus.
In light trail photography, you generally want a larger depth of field so that all of the light trails are sharp and defined.
Remote Shutter Release
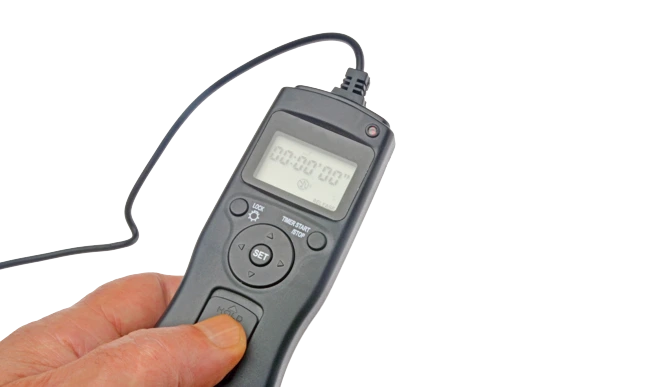
A remote shutter release is a great option for light trail photography because it allows you to take long exposures without having to touch your camera. This is important because it helps to avoid vibration, which can cause your photos to be blurry.
There are many different types of remote shutter releases available, so you should be able to find one that suits your needs.
Best Time and Place to shoot Light Trails
When to Shoot
The best time of the day to shoot light trails photographs is during the evening or night time. This is when there is less light and you will be able to capture the light trails more easily.
Another benefit of shooting during the evening or night time is that the sky will be darker, which means that you will get a better contrast between the light trails and the sky.
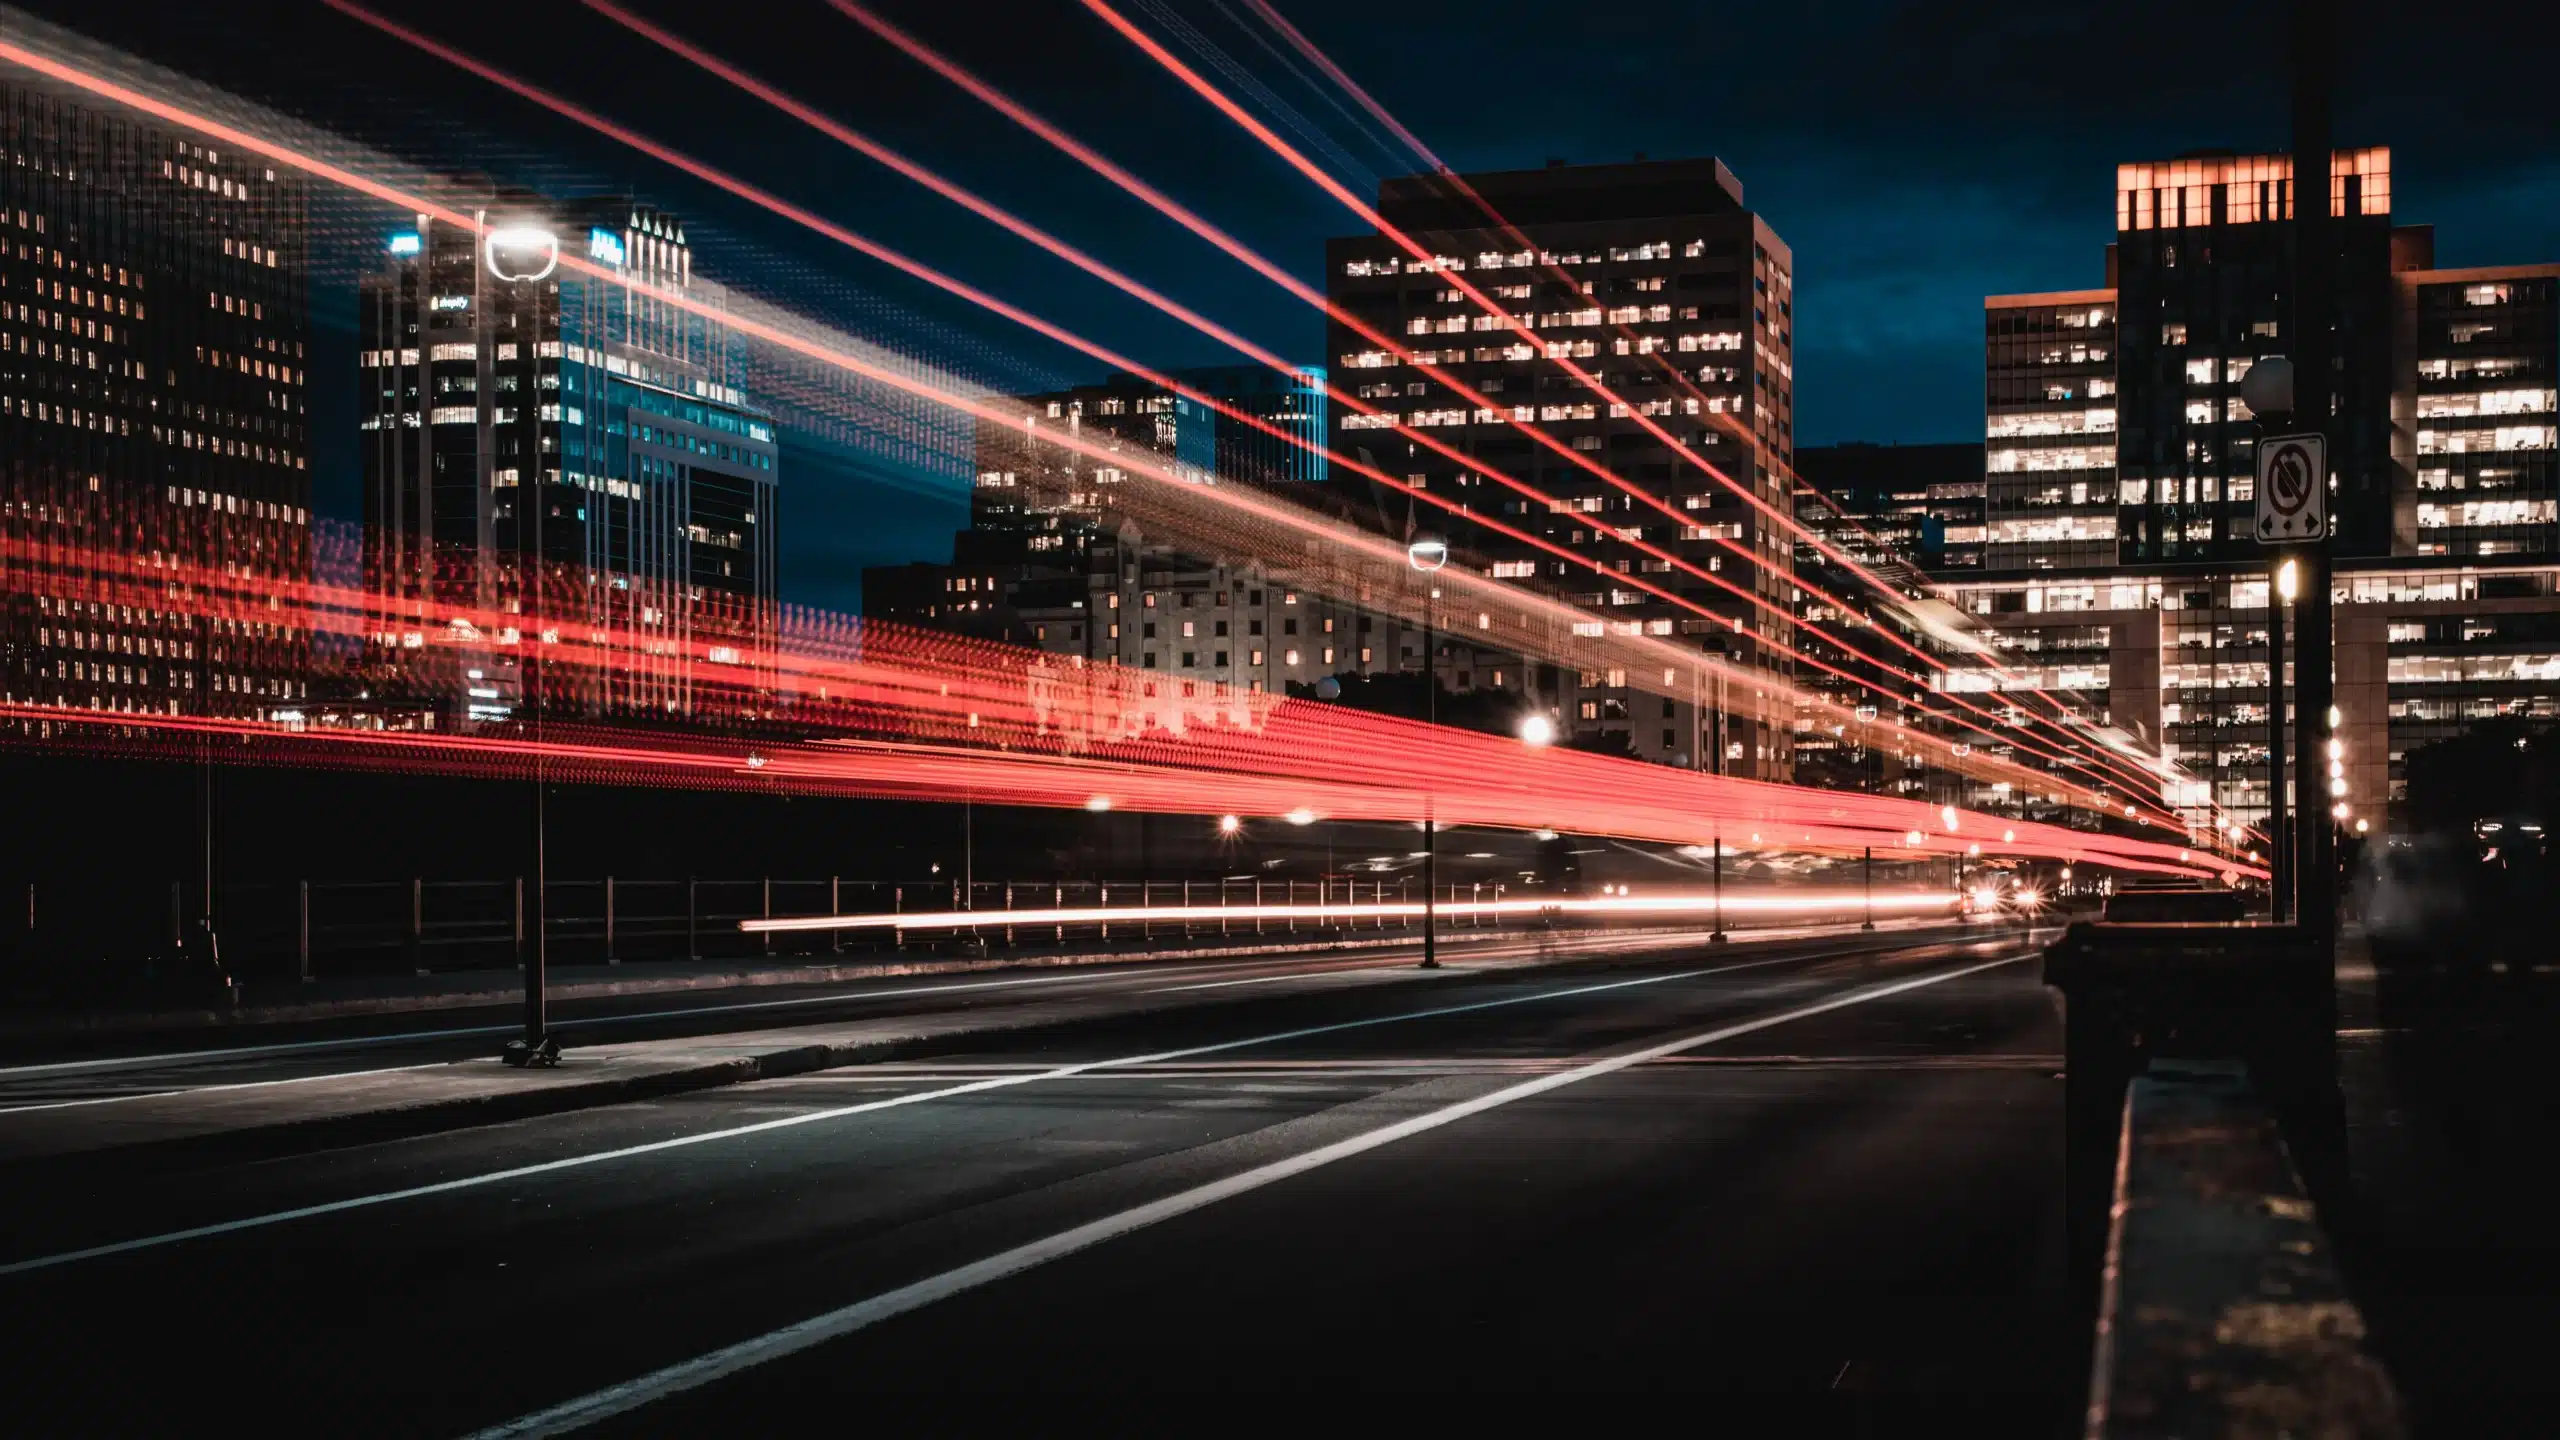
If you’re looking to photograph light trails in a cityscape, then the best time to shoot is during the late evening when there are fewer lights on. This will help to create a more dramatic effect in your image.
Where to Shoot
When it comes to finding a location for light trail photography, you have a few options. You can either shoot in a cityscape or you can find a rural area with fewer lights.
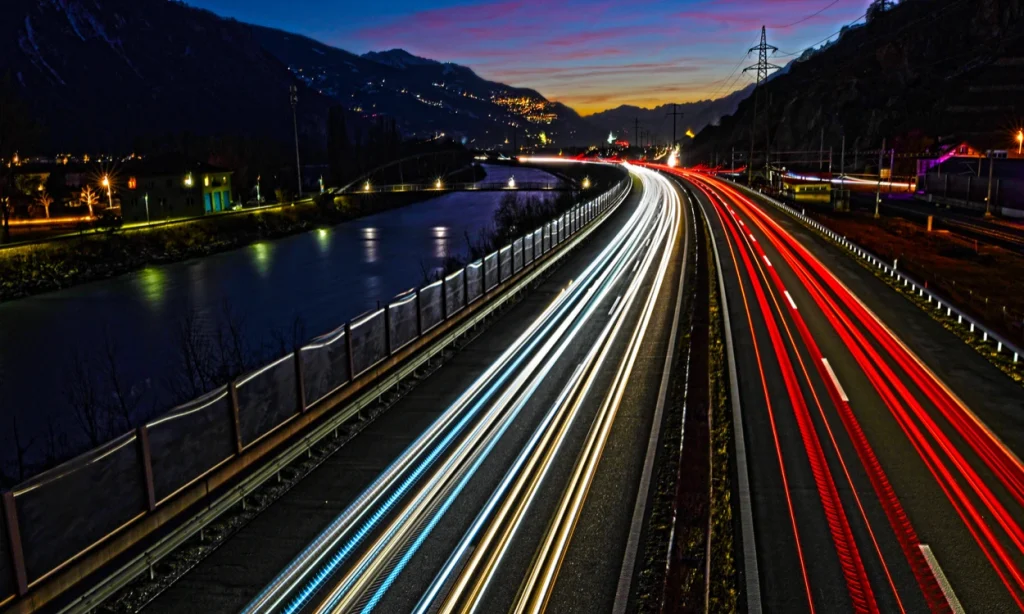
If you’re shooting in a cityscape, then you will want to find an area with plenty of light trails. A good place to start is near busy intersections or areas where there are a lot of cars.
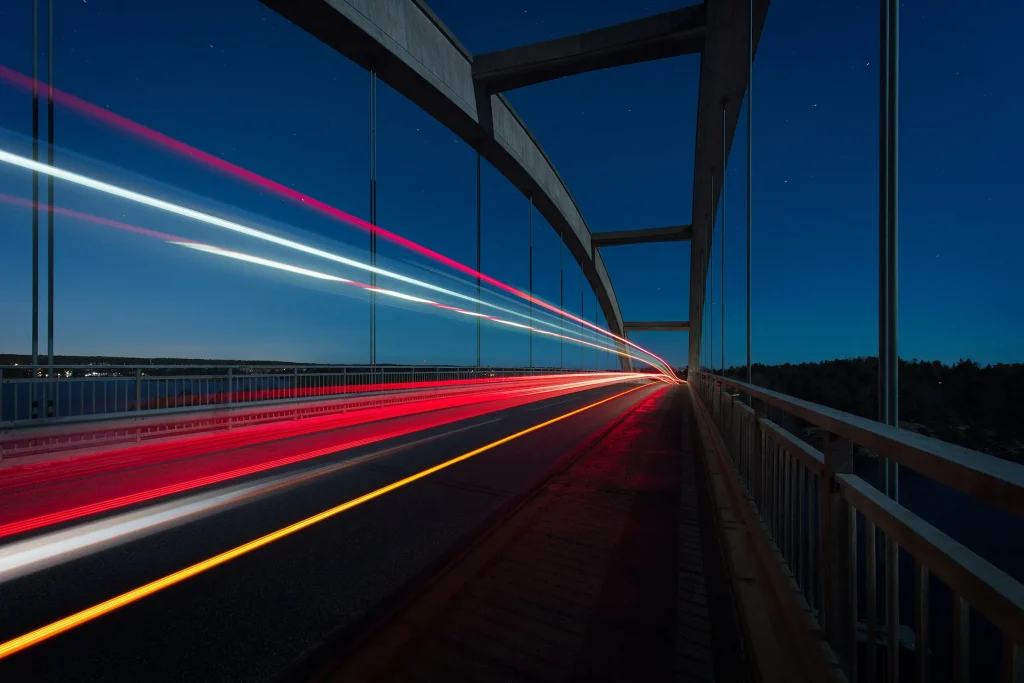
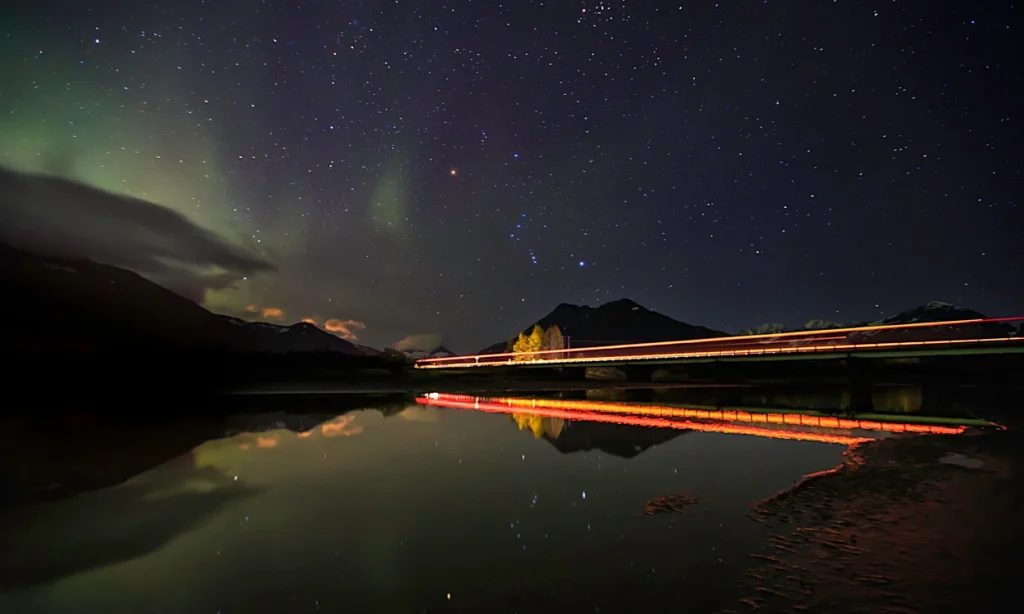
If you’re shooting in a rural area, then you will want to find an area with fewer light trails. A good place to start is near a lake or river where there are fewer light sources.
Once you’ve found a location, you will want to experiment with different compositions to see what works best. You can try shooting light trails from different angles and distances to see what results you get.
How to Photograph Light Trails
In light trail photography, you generally want to use a long exposure to capture the light trails. This means that you will need to keep your camera still for an extended period of time.
To have a better result I always try to have:
- A tripod
A tripod is the best option for keeping your camera still during a long exposure. If you don’t have a tripod, then you can try to set your camera down on a flat surface.
- A remote shutter release
A remote shutter release is a great option for light trail photography because it allows you to take long exposures without having to touch your camera. This is important because it helps to avoid vibration, which can cause your photos to be blurry.
Here are the exact steps you need to follow in order to shoot a light trail photo.
1) Set Your Camera Properly
The first step is to properly prepare your camera, mounting in on the tripod, with the right lens and the remote shutter release attached or connected.
2) Frame your Shot
Now it is time to shape your composition and move around to find the best perspective.
3) Camera Settings
Once you have your camera in place, you will want to set the aperture, shutter speed and ISO.
For the aperture, I always try to set it between and f/11 and f/22 depending on the lighting conditions. In this way you make sure to have a deep focus and therefore the image would be more sharp.
For the shutter speed, when I shoot light trail photography, I always test different ones. I usually start from 3 seconds and slightly increase it until I find the right one for the specific composition and subject I framed.
When it comes to ISO, I try to keep it on the Native ISO since it is the one that will ensure to have almost no noise at all.
4) Start Shooting
Once you have your settings in place, you can start taking photos. Be sure to experiment with different compositions and angles to see what works best.
Best Gear to Have for Light Trails Photography
When it comes to light trail photography, you will want to have a few pieces of gear that will help you get the best results. Here are a few items that I recommend:
Tripod – A tripod is essential for keeping your camera still during long exposures.
Remote shutter release – A remote shutter release is helpful for taking long exposures without having to touch your camera. This helps to avoid vibration and blurriness in your photos.
Neutral density filters – Neutral density filters help to reduce the amount of light that enters your lens. This is helpful for shooting in bright light conditions or when you want to use a longer shutter speed.
Wide angle lenses – A wide angle lens is great for capturing light trails from a distance.
Telephoto lenses – A telephoto lens can be helpful for getting closer to your subject and isolating light trails.
Camera with Bulb mode – Bulb mode allows you to keep the shutter open for as long as you want. This is helpful for taking very long exposures.
How to Edit Light Trails in Lightroom
What is Lightroom
Lightroom is a powerful tool for editing light trails photos because it allows you to make global adjustments to your photo as well as fine-tuned edits.

With Lightroom, you can adjust the exposure, white balance, shadows, highlights, and much more. Additionally, Lightroom provides non-destructive editing so you can always go back and make changes to your photo if you’re not happy with the results.
How to edit light trails photographs
Now we are going to see how easy and intuitive is to edit a photo in Lightroom with this Step by Step guide.
Assuming you have already imported the photo into Lightroom, here are the steps you need to follow:
1) Select the photo you want to edit by clicking on it in the Library module.
2) Make any global adjustments to your photo in the Basic panel. Here you can adjust things like exposure, white balance, and contrast.
3) Edit the light trails in the Detail panel. This is where you can make adjustments to things like sharpness and noise reduction.
4) Save your changes by clicking the “Save” button in the upper right-hand corner of the screen.
Lightroom provides a variety of presets that can be used to edit light trails photos. These presets are a great starting point for editing your photo and can be adjusted to your liking.
To use a preset, simply click on it in the Presets panel and Lightroom will automatically apply the changes to your photo.
Conclusion
Light trail photography is a great way to capture the beauty of light in motion.
By using a long shutter speed, you can capture light trails that would otherwise be invisible to the naked eye. With the right gear and camera settings, anyone can take stunning light trail photographs.
And with Lightroom, editing light trail photos is easy and fun.
So get out there and start capturing some light!
If you enjoyed this article, please feel free to share it with your friends or leave a comment below.
Thanks for reading!
FAQ – Light Trail Photography
What is light trail photography?
Light trail photography is a technique that involves capturing the movement of light over time, typically using long exposure settings on a camera. This method allows photographers to create stunning images that depict the motion of light sources, such as car headlights or fireworks.
How do I capture light trails effectively?
To effectively capture light trails, you need to use long exposure photography techniques. This involves adjusting your exposure settings, such as aperture and shutter speed, to allow your camera sensor to collect light over a longer period, resulting in beautiful light trail images.
What are the best settings for light trail photography?
The best settings for light trail photography typically include a low ISO setting, such as ISO 100, a wide aperture to let in much light, and a slow shutter speed to capture the movement of light. Experimenting with these settings can help you achieve stunning results.
What equipment do I need for light trail photography?
An important piece of equipment for light trail photography is a DSLR or mirrorless camera that allows for manual control of exposure settings. Additionally, a sturdy tripod is essential to prevent camera movement during long exposures, and a shutter remote can help trigger the shutter without causing vibrations.
When is the best time to take light trail photos?
The best time to take light trail photos is during the night with light, particularly right before sunset or after dark when there is enough contrast between the light trails and the background. This enhances the visibility of the light trails in your images.
How can I find the right vantage point for capturing light trails?
Finding the right vantage point is crucial for capturing light trails. Look for locations with a clear view of roads or paths where vehicles will pass. Elevated positions or areas with interesting backgrounds can also enhance your light trail photos.
What is light painting in photography?
Light painting is a technique that involves using a light source to “paint” in the air while the camera captures the movement during a long exposure. This can create unique and artistic light trail images, adding creativity to your photography at night.
How can I avoid camera movement during long exposures?
To avoid camera movement during long exposures, use a sturdy tripod and consider using a shutter remote to trigger the shutter. Additionally, keeping your ISO as low as possible and using a stable surface can help minimize any potential camera shake.
What types of light sources can I use for light trail photography?
You can use various light sources for light trail photography, including car headlights, fireworks, or even handheld flashlights for light painting. The key is to choose interesting light that will create dynamic trails in your images.
How can I enhance my light trail photos in post-processing?
You can enhance your light trail photos in post-processing by adjusting exposure settings, contrast, and color balance. Tweaking these elements can intensify your road or light trail photos, making them more visually striking and appealing.