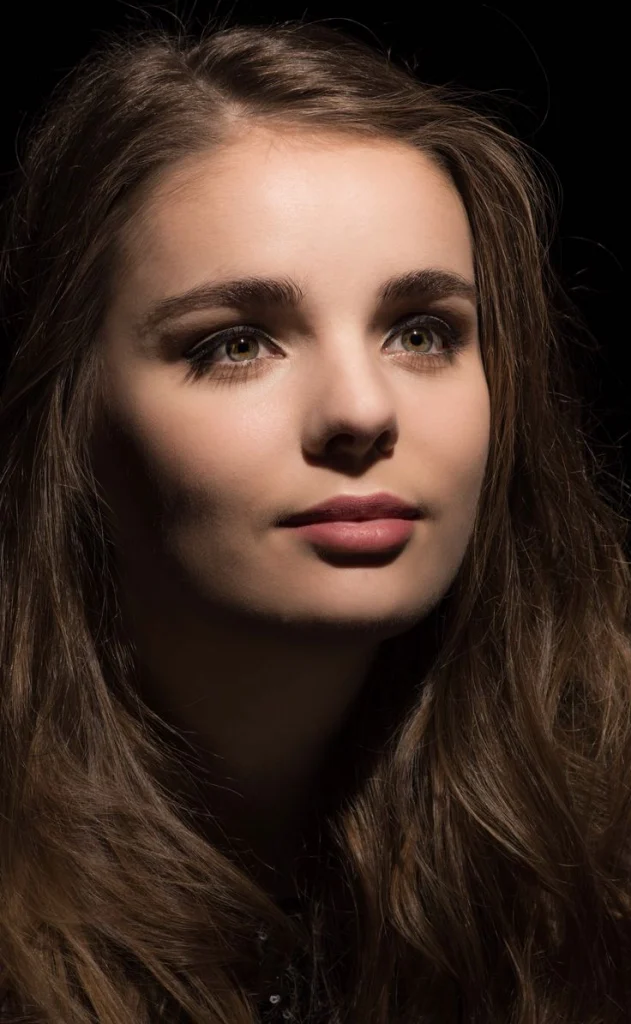
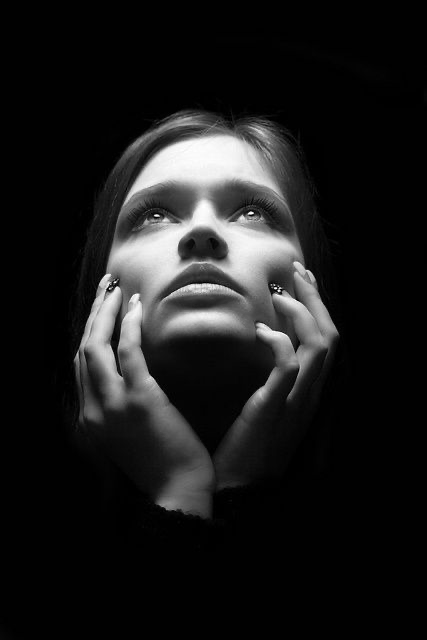
Butterfly lighting is a popular type of portrait lighting that is often used in beauty and fashion photography.
It is named for the butterfly-shaped shadow that it creates under the subject’s eyes. This type of lighting is very flattering, and it can be used to create beautiful portraits that look natural and elegant.
In this guide, we will discuss what butterfly lighting is, how to properly set it up, its advantages and when to use it.
Let’s get started!
What is Butterfly Lighting Photography?
Butterfly Lighting Definition
Butterfly lighting is a type of lighting technique used very often in portrait photography that uses a main light placed directly in front of the subject, a little bit above eye level.
This technique got its name from the butterfly shadow it casts on the subject’s face.
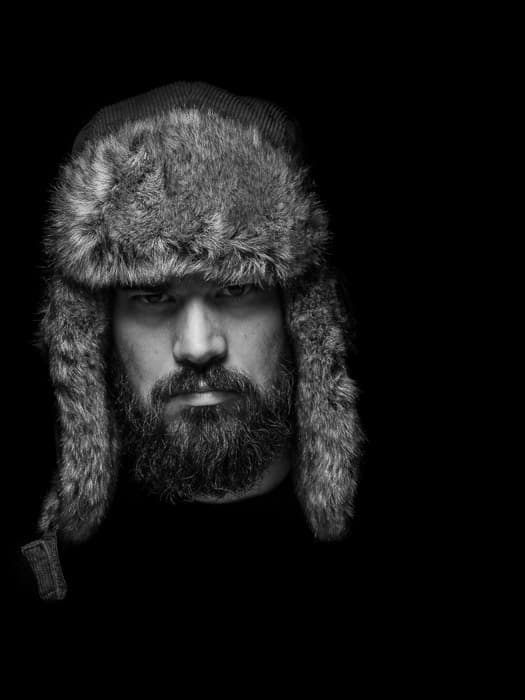
This type of lighting is perfect for portrait photography, particularly when you want to create a sense of depth and dimensionality.
Butterfly lighting is also great for hiding blemishes and wrinkles. It can be used to create either a soft or dramatic effect, depending on the pose and expression of the subject.
To set up butterfly lighting, you will need one main light placed directly in front of the subject at a 45-degree angle, a little bit above eye level.
We are going to go through the full setup in detail later in this guide.
Butterfly Shaped Shadow Origin
The butterfly lighting was first used by Josef von Sternberg in the 1930s. He was a Hollywood director who is most known for his work with Marlene Dietrich.
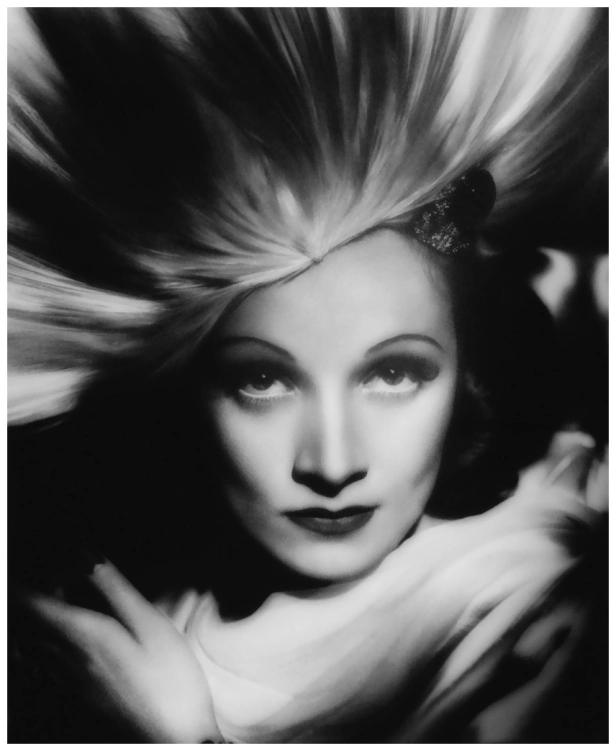
Sternberg used butterfly lighting to create a sense of mystery and allure around Dietrich’s character.
Butterfly lighting has been used in portraiture ever since.
When Should You Use Butterfly Lighting?
Butterfly lighting is a great choice for many different types of portraits, including headshots, beauty shots, and fashion photography.
It is especially well-suited for subjects with high cheekbones and delicate features.
Butterfly lighting can be used to create a variety of different looks, from soft and romantic to dramatic and edgy.
Equipment Needed For Butterfly Lighting
For this specific lighting technique you won’t need much equipment.
Camera
Any type of camera will work for butterfly lighting photography, from a DSLR to a smartphone.
That’s because the final result depends more on the lighting itself rather than from the type of camera you are using.
Lens
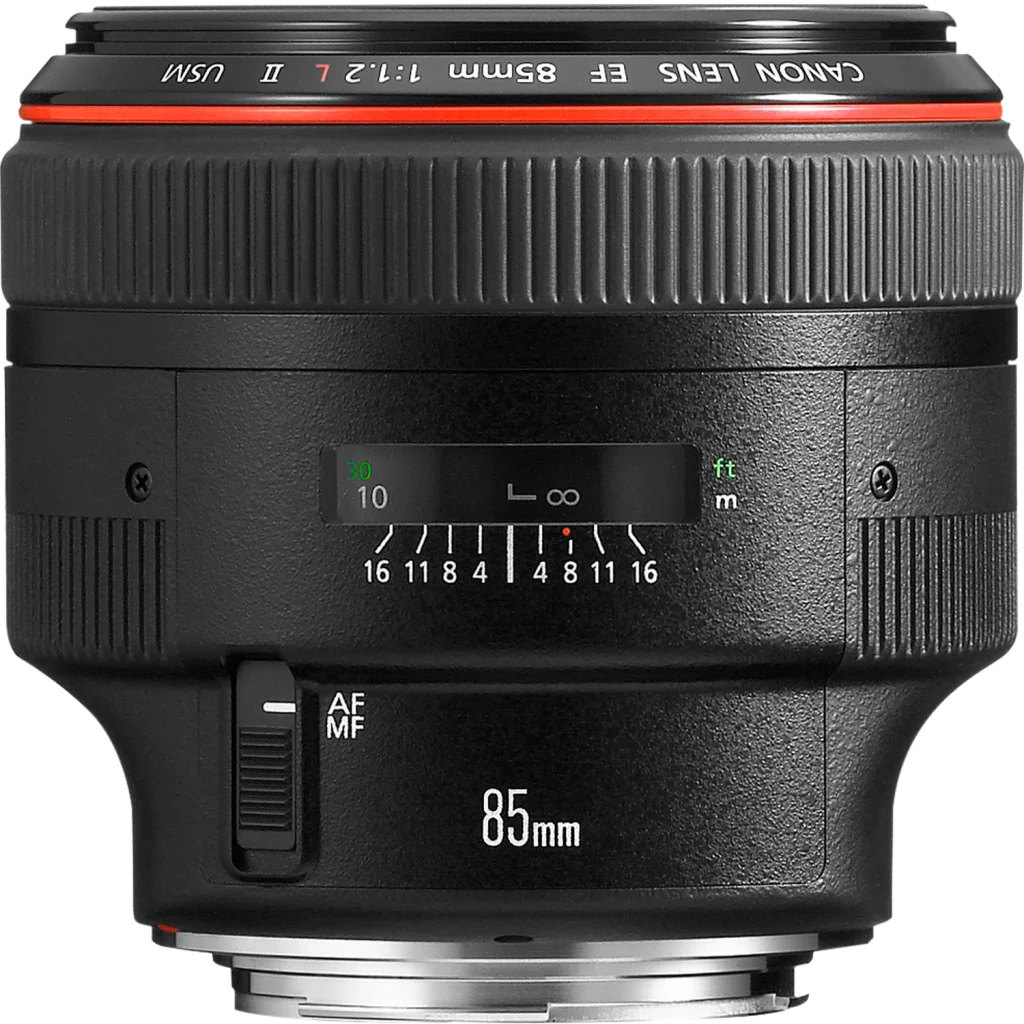
Since butterfly lighting is used mostly for portrait photography, I would try to use an 85mm lens.
This focal length will help to compress the features of your subject and make them look more flattering.
One of my favorite lens I always use and I think creates stunning portraits, is the Canon 85mm f/1.2L.
Butterfly Lighting Equipment
For butterfly lighting, you will need one key light placed in front of the subject at a 45-degree angle.
The key light should be a bit above eye level.
You can use either a studio strobe or a speedlight for this type of lighting.
For either light, I would recommend using a modifier like an umbrella or softbox to create softer light.
If you have never bought a light before and you want to experiment with the butterfly lighting effect, I would recommend buying a Godox Light.
Godox makes really affordable and versatile lights that are perfect for beginner photographers.
Reflector
You will also need a reflector to help bounce some light back onto the subject’s face.
I would recommend using a white reflector for this type of lighting.
You can either buy a reflector or make your own at home.
To make your own reflector, all you need is a piece of white foam board or cardboard.
You can also use a piece of white fabric or clothing to reflect light back onto the subject.
Background
You don’t need a specific background for butterfly lighting, but I would recommend using something simple and plain like a white wall or sheet.
This will help to make your subject stand out and not get lost in a busy background.
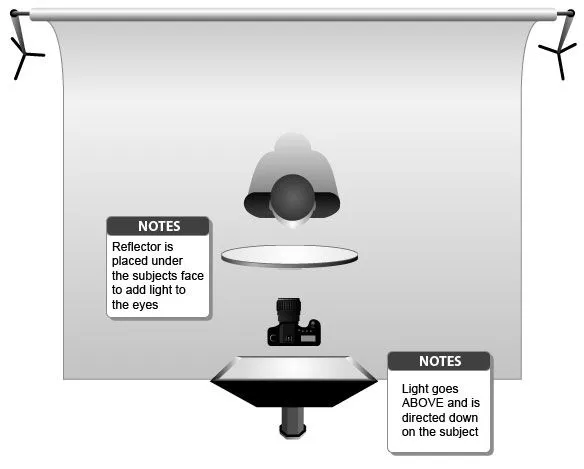
Butterfly Lighting Setup
The Butterfly Lighting Setup isn’t too complicated to set up since it is create by just one light and one reflector. What matters more is how we position everything in relation to the subject we are photographing.
Position the Camera
The first step is to position your camera.
Place the camera directly in front of the subject at a 90-degree angle.
You want to make sure that the camera is level with the subject’s eyes.
If you are using a tripod, now is the time to set it up.
Place the Subject
Next, we need to choose a position for our subject.
I like to have my subject seated or standing in front of a white background.
This will help to create a simple and clean look in the photograph.
If you are using a background that is not white, try to place your subject so that they are facing the light and not the dark background.
This will help to ensure that they are properly lit and not lost in the shadows.
Set the Light
Now we need to position our key light.
Place the key light directly in front of the subject, at a 45-degree angle.
The light should be about four feet away from the subject and slightly above eye level. This will creaste the butterfly shadow under the subject’s nose.
You can use a light stand or c-stand to place the key light.
If you are using a speedlight, make sure that it is in manual mode so that we can control the power output. And it is always recommended to soften the light source, especially when using a flash unit. You can use an umbrella, softbox or even a diffuser.
Place the Reflector
The next step is to position the reflector which works as a fill light to bring up in exposure the subject’s chin.
Place the reflector under the subject’s face trying to fill in the chin and softening all the shadows created by the main light.
The reflector should be at a 45-degree angle and about two feet away from the subject.
You can hold the reflector yourself or have someone else hold it for you.
If you are using a white foam board, you can tape it to a light stand or c-stand.
How to add your own style to the Butterfly Lighting Setup
While the butterfly lighting setup is a great way to create soft and beautiful light, there are ways to add your own style to it.
Here are a few ideas:
Change the Angle of the Key Light
The angle of the key light is really what gives butterfly lighting its name.
The butterfly light is placed at a 45-degree angle and creates a butterfly shadow under the subject’s nose.
If you want to change the look of butterfly lighting, try changing the angle of the key light and therefore the butterfly lighting pattern.
You can experiment with different heights and directions to see what looks best.
Move the Subject to a Different Location
Another way to add your own style to butterfly lighting is by moving the subject to a different location.
While butterfly lighting is typically done with the subject in front of a white background, you can try placing the subject in front of a different colored background or even in an outdoor setting.
Just make sure that the subject is still facing the light and not lost in the shadows.
Use a Different Reflector
The reflector is a key part of butterfly lighting and there are many different types to choose from.
While a white foam board is the most common reflector, you can also use a silver or gold reflector.
Each reflector will give you a different look.
Try using a black reflector to create a more dramatic effect.
Try Different Light Colors
Another way to add your own style to butterfly lighting is by using different light colors.
While the typical butterfly setup uses white light, you can try using different colors like amber or blue.
Just make sure that the light color is complementary to the subject’s skin tone.
Conclusion
Butterfly lighting is a great way to create soft, beautiful light. It is also one of the most versatile lighting setups that can be used in a variety of situations.
I hope this guide has helped to show you how to set up butterfly lighting and how to add your own style to it.
And remember to experiment with different lighting setups to get the best out of your photo shoots!
Happy Shooting!
Frequently Asked Questions
Paramount lighting is a type of butterfly lighting where the light is placed directly above the subject’s head, creating a shadow under the chin. This type of lighting is often used in fashion photography.
No, butterfly lighting and Rembrandt lighting are not the same.
Shortlighting is a type of lighting where the light is placed in front of the subject, often at a 45-degree angle. This type of lighting is often used to create a more dramatic effect.
Broadlighting is a type of lighting where the light is placed behind the subject, often at a 45-degree angle. This type of lighting is often used to create a more flattering effect.
Butterfly lighting is a popular lighting pattern used in portrait photography, characterized by the unique shadow it creates under the nose, resembling the shape of a butterfly. It’s a basic but effective method for achieving a flattering effect on the subject’s face, involving the key light being placed directly in front of and above the subject’s face. This technique highlights the cheekbones and jawline, making it a favorite among portrait photographers for its simplicity and the beautiful results it can produce.
To set up butterfly lighting, you need a light source, such as a studio light or a bright natural light window. Position the light in front of and slightly above your subject, angled down to cast a shadow under the nose that looks like a butterfly. The light should be directly in line with the subject’s face to achieve the desired portrait lighting pattern. Using a reflector below the face can help soften shadows, particularly under the chin.
Yes, butterfly lighting can be achieved using just one light. This is one of its advantages, making it easy to set up. The key light is placed directly in front and above the subject to create the signature shadow under the nose. For best results, a light and modifier such as a beauty dish can be used to direct the light precisely and soften it, making the subject look their best.
A beauty dish is a preferred light modifier for many portrait photographers when creating butterfly lighting because it offers a blend of hard and soft light, perfect for illuminating the face. The beauty dish helps to reduce the harshness of shadows while maintaining the quality of light, lending a more natural and flattering look to the portrait photos. Its design helps to direct the light more accurately on the subject’s face, enhancing the butterfly lighting effect.
Butterfly lighting can be achieved using natural light by positioning your subject in a location where the sunlight comes from directly in front and above, such as near a large window around midday. You may need to use reflectors to help control the shadows and highlight the effect on the subject’s face. It’s an excellent way to utilize the available light for great photography outcomes without the need for extensive studio lighting.
Butterfly lighting is highly versatile and can be used for a wide range of portrait types. However, it’s particularly advantageous for close-ups, beauty shots, and headshots where the aim is to emphasize facial features, create a flattering contour of the face, and impart a professional and polished look. Since the lighting pattern highlights cheekbones and defines the jawline, it’s perfect for subjects wanting to achieve a more refined and elegant portrait.
While butterfly lighting primarily involves the use of one key light, incorporating additional lights like a fill light or a hair light can further enhance your portraits. A fill light placed opposite the key light helps soften shadows for a more even light distribution. A hair light, positioned behind the subject, adds depth and dimension by separating the subject from the background. These additions, while not necessary, can elevate the overall quality and look of the portrait photos.
Achieving butterfly lighting does not necessarily require advanced or expensive equipment. The basics can be easily met with a simple light setup— using a single light source and a reflector. For those who wish to refine the lighting effect, investing in a quality light and modifier like a beauty dish can be beneficial. However, even with minimal gear, learning to light with the butterfly pattern can significantly improve your portrait photography.