The Mamiya RZ67 is a modular medium-format film system built around bellows focusing and a revolving back. It is worth considering when the large negative and deliberate setup suit the work. Condition, compatibility and a film test matter more than the model’s reputation.


Identify the exact body
| Model / family | Distinction to establish |
|---|---|
| RZ67 Professional | Original RZ generation; use its own instructions for controls and accessories |
| RZ67 Professional II | Later RZ body; the linked manual is specifically for this model |
| RZ67 Professional IID | Later digital-back interface provisions do not make every digital back plug-and-play |
| RB67 | Related but different mechanical system; do not treat RB and RZ bodies, lenses and backs as universally interchangeable |
Consult the original RZ67 Professional II manual and the model-specific system charts. Some cross-generation combinations are possible only with stated limitations or adapters. Verify the exact combination instead of assuming the similar names prove compatibility.
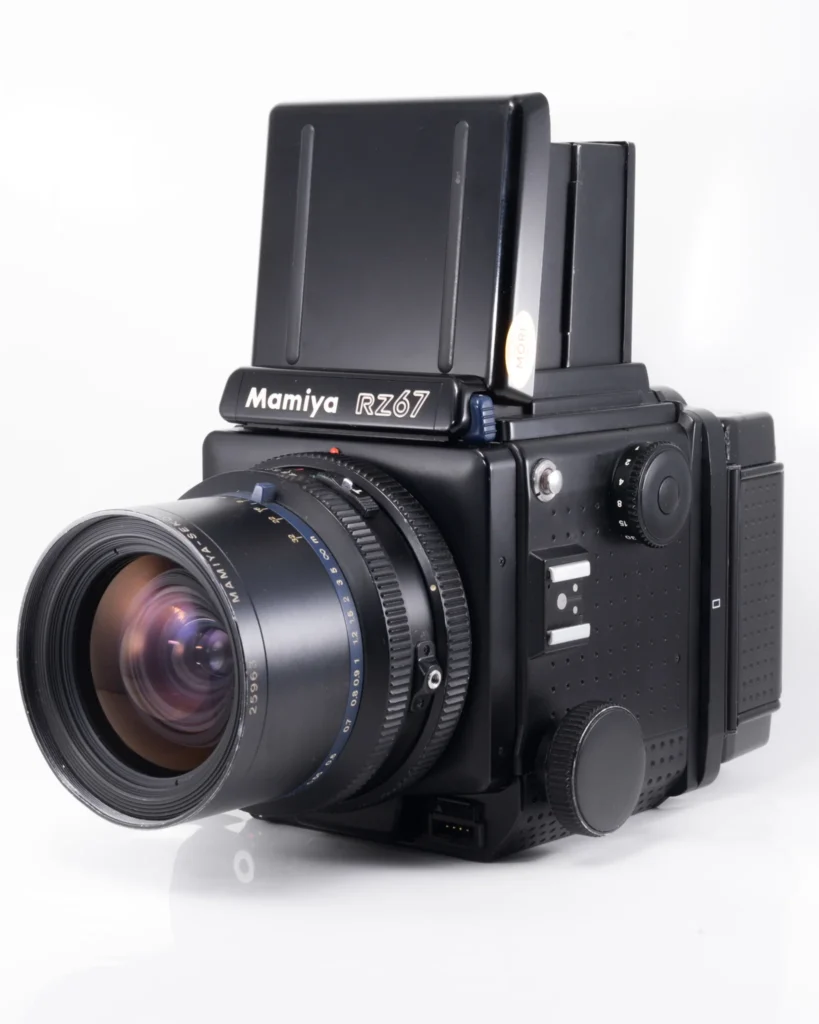
Specific Pro II compatibility limits
The Pro II manual lists an electronic lens-shutter range of 8 seconds to 1/400 second, with intermediate settings, plus its documented B/T procedures. Its fine-focus control and intermediate shutter settings are useful distinctions from the earlier generation.
With a supported RB67 lens, the Pro II manual requires the RBL body setting and shutter-speed selection on the lens. Infinity focus requires approximately 7 mm of bellows extension, so the ordinary body distance scale is not applicable. Some C-series combinations need the specified mounting ring; older RB lenses require a service compatibility check for shutter torque before use.
RB G-lock holders need the G Adapter RZ and the manual’s separate winding procedure. Some normal dark-slide and multiple-exposure safeguards do not operate in that configuration. The original RZ PD prism also does not function on the Pro II. These exceptions explain why buying a mixed kit by mount appearance alone is risky; read the full compatibility section before assembly.
What the system changes on a shoot
Revolving back: change frame orientation through the supported back mechanism instead of rotating the whole camera. Check the orientation indicators and framing mask. Bellows focusing: the lens-to-film extension changes as you focus, so close work may require exposure compensation according to the camera’s scale and manual. Lens shutter: operation depends on the compatible lens, body controls and electronic power system.

These features favor a measured workflow. For a moving event, assess the complete kit’s weight, focus method and film changes before assuming the larger negative will improve the assignment.
A portrait workflow that uses the revolving back
Set camera height and distance for the portrait before choosing horizontal or vertical framing. Rotate the back using the documented control, then check the finder’s framing mask and focus again. The benefit is that the camera can remain in the same orientation on its support; the subject and composition still need attention.
The Pro II manual, pages 28–29, describes the focus lock and revolving-back procedure. It warns against rotating the back while pressing the shutter release. Make the orientation change between exposures and confirm the mechanism reaches its supported position. Do not use force when an interlock resists movement.
Close focus needs an exposure decision
Bellows focusing makes close framing possible without relying entirely on the lens’s own focusing mechanism, but extending the lens changes exposure at the film. After focusing, read the compensation scale for the mounted lens and actual extension. The manual’s close-up section distinguishes no correction, half-stop and full-stop regions.
With a separate incident meter, include the indicated correction. As a simple example, if your meter suggests f/8 at 1/125 and the scale requires one additional stop, f/5.6 at 1/125 or f/8 at 1/60 are approximately equivalent ways to provide it. Choose according to depth of field and motion. This example explains a stop; it does not assign one stop to every close-up.
A compatible through-the-lens metering finder accounts for the extension differently: the manual says its TTL metering corrects for close-up exposure. Do not automatically add the same correction twice. Identify your finder and metering route before applying a number.
Choose the larger frame with the entire session in mind
For controlled portraits or still life, the deliberate focus and back workflow may fit the pace. If the subject keeps moving between distances, rehearse how quickly you can refocus, meter and advance before making the RZ67 the only camera. A larger negative cannot recover a missed expression or misplaced focus.
Compare a complete RZ kit with a complete 645 kit, including finder, film holder, lens and support. Carry the actual equipment for a realistic period if the seller or rental house allows it. “Handheld capable” and “comfortable for my entire location session” are different decisions.
For an unfamiliar used body, start with one known lens and holder. Add accessories after the first combination has passed a film test. If several untested backs and lenses enter the system at once, a faulty result becomes harder to trace.
Inspect a used RZ67 as a system
- List the exact body, lens, back and insert. Confirm the dark slide, finder, winding parts and correct battery are included.
- Inspect bellows for damage and abnormal folding through their permitted travel. A visual check alone cannot prove light-tightness.
- Check lens condition, aperture and normal shutter behavior using the manual’s sequence. Never force mounting or cocking components.
- Inspect back seals, latches, dark-slide slot and counter. Ask for a test roll showing frame spacing and no light leaks.
- Compare focus on the screen with a film test. A bright finder image does not establish calibrated film-plane focus.
- Run the shutter and film transport with the correct battery and controls. If the camera refuses to release, check documented interlocks before calling it broken or attempting a repair.

Field versus studio use
In a studio, a stable support, repeatable light and deliberate focus can suit the system. In the field, plan transport, weather protection, film changes and a support rated for the complete camera. A waist-level finder is an operating choice, not a guarantee of easier portrait orientation or faster focusing.

For close subjects, record the actual extension and apply the manual’s exposure compensation. For flash, use the compatible lens/body procedure and verify synchronization with a test.
Budget beyond the advertised body
Compare a complete tested kit with a complete tested kit. Include lens, back, insert, finder, caps, support, correct power, processing and scans. Ask a repair provider whether it services the exact model and fault before buying a discounted defective body.
An asking price is not a sold price, and a seller’s cosmetic grade does not prove film transport or shutter accuracy.
Compare the Mamiya 645 family for a smaller frame and different modular choices, and the 645 Pro for its specific controls. Choose the film and lab before buying: the monochrome workflow explains how processing and scanning affect the result.